How to Paint Reflections: Mastering Water and Glass in Realism
Reflections have been a central element in painting for centuries, used by artists to create depth, contrast, and a sense of realism in their work. Whether painting water, glass, or metal, mastering the art of reflections can elevate your work to new heights of realism and artistic expression. This blog post will guide you through techniques and tips for painting reflections in these surfaces, covering everything from basic principles to advanced methods. Whether you are a beginner or an experienced artist, this article will help you understand how to accurately depict reflective surfaces with both realism and artistry.
Understanding Reflections in Art
Before diving into techniques, it’s important to understand the nature of reflections. In real life, reflections occur when light hits a shiny surface and is reflected back. The clarity, intensity, and sharpness of these reflections depend on factors like the surface’s smoothness, the angle of light, and the surrounding environment. As an artist, your goal is to replicate these conditions in your painting, capturing both the reflections’ accuracy and the way they interact with the environment.
The Basics of Reflections: Light, Angle, and Surface
To effectively paint reflections, you need to grasp how light works on reflective surfaces. Here are the basic principles:
-
Light Reflection: A highly reflective surface, such as water, glass, or metal, will bounce back light almost exactly in the opposite direction. The reflection will often be a distorted or flipped version of the object it reflects.
-
Angle of Reflection: Reflections follow the principle of the angle of incidence. This means that the angle at which light hits the surface is equal to the angle at which it reflects. For instance, if a tree is reflected on the surface of a pond, the reflection will appear in reverse—upside-down—and distorted, depending on the angle.
-
Surface Properties: Different reflective surfaces behave differently based on their texture. Water, for example, reflects more clearly when still, while a moving surface will create a distorted reflection. Glass is often clear, but the reflection can still be seen depending on the lighting and surroundings. Metal surfaces tend to show reflections with a shiny, polished finish.
Step-by-Step Guide: Painting Reflections in Water
Water is one of the most common reflective surfaces in art. Whether it’s a calm lake, a babbling brook, or the ocean, painting reflections on water can add a sense of tranquility or drama to your scene. Here’s how to approach it:
1. Observing the Reflection
Before you begin painting, take a moment to observe the reflection in the water. The reflection should be a mirror image of the object above the water. However, remember that water often distorts this reflection slightly, creating a softer, blurred version of the object.
2. Start with the Water’s Base Color
Begin by painting the water’s base color, which is usually a mixture of the surrounding environment’s colors. For example, if you’re painting a lake with trees and a blue sky, the water may have shades of blue, green, and brown. This base layer should be applied smoothly with a flat brush to create the calm effect typical of reflective water.
3. Add the Reflection
Next, paint the reflection. Start by defining the shapes of the objects reflected in the water, but keep the edges soft and a little blurred. Use lighter strokes with thinner paint or diluted paint to simulate the subtle distortion of the reflection. For example, trees or buildings reflected on water will have blurred edges and can be a bit darker than the actual objects due to the depth of the water.
4. Creating Ripples and Distortions
To add realism, introduce slight ripples in the water. This will affect how the reflection appears, creating subtle distortions. You can achieve this by lightly brushing horizontal lines or soft curves in the water to simulate small waves. Use a dry brush to smooth out areas that should still have some reflection, but with distortion.
5. Fine Details and Highlights
Once the base and reflection are in place, refine the details. Add highlights to the water’s surface where the light hits, especially along the top edge of the ripples. These highlights will give the water a realistic shine and make it appear more reflective. Use a soft brush and white paint or a light color to paint these subtle details.
Painting Reflections in Glass
Glass is a unique reflective surface that combines transparency and reflection. Whether painting a wine glass, a window, or a mirror, glass requires careful attention to the play of light and reflections.
1. Capture Transparency and Reflections
When painting glass, you need to balance transparency with reflection. Start by painting the glass’s shape with light washes of color to allow the background to show through. Then, add the reflection of objects around the glass. These reflections should appear distorted and may vary in clarity depending on the glass’s smoothness and the angle of light.
2. Define the Shape of the Glass
Use thin, precise lines to outline the shape of the glass, paying attention to the curves and edges that are characteristic of glassware. A slightly soft line can help create a more realistic effect, especially if the glass is slightly blurred by condensation or light.
3. Add the Reflections of Light and Objects
As glass reflects its surroundings, it may show subtle changes in light, objects in the background, or the environment surrounding it. Paint these reflections softly, keeping in mind that glass often distorts shapes and colors. The reflection of the object inside the glass (if any) should be visible, but again, slightly blurred.
4. Highlights and Shine
Glass often has a glossy finish, which means you’ll need to add highlights. Use a small brush and pure white or a very light color to add small highlights along the edges or on the surface of the glass where the light hits. These highlights should be subtle but significant to create that “shiny” appearance typical of glass.
Painting Reflections in Metal
Metal surfaces, such as chrome, silver, or gold, require a unique approach. Metals are highly reflective and tend to reflect more intensely than other surfaces.
1. Understanding the Metallic Reflection
Metals tend to have sharper and more intense reflections. Depending on the metal type, you might see reflections of surrounding objects in a very clear, almost mirror-like way. Unlike water or glass, the reflection on metal will often have defined edges and more contrast.
2. Create the Base Layer of the Metal
Start by painting the base layer of the metal. Use a medium-dark color, such as gray or brown, to establish the tone of the metal. Depending on the type of metal you’re painting, you can adjust the color to suit. For example, silver will have a cool, bluish tone, while copper or brass will be warmer and more orange.
3. Add Reflective Details
Begin adding the reflections by observing the surrounding objects that will be mirrored on the metal surface. Use a small brush to paint these reflections carefully, paying attention to the clarity of the reflection. Metals, particularly polished metals, tend to reflect their surroundings with sharp edges.
4. Refining the Highlights
Metal surfaces are highly reflective, so adding sharp highlights will create a convincing shiny effect. Use white or light yellow for highlights, and apply them in small amounts to show how the light interacts with the metal. These highlights will give your metal object a realistic, polished appearance.
Techniques for Painting Realistic Reflections
While each reflective surface presents its own challenges, there are common techniques you can use to achieve a more convincing reflection:
1. Use of Glazing
Glazing is a technique where thin layers of paint are applied over a dry base layer to create depth and richness. This is especially useful for creating smooth, reflective surfaces like water or glass. Apply a transparent layer of paint to deepen the color and give the reflection more intensity.
2. Pay Attention to Contrast
Reflections are all about contrast. The more dramatic the difference between the object and the reflected surface, the more noticeable the reflection will be. Ensure that the reflective surface is darker or lighter than the object it reflects to create the desired effect.
3. Blurring and Distortion
In reality, reflections are rarely perfect. Water, glass, and metal all distort the reflected objects to some degree. Use soft brushstrokes or a dry brush to blur edges and introduce the distortion that naturally occurs in reflective surfaces.
Common Mistakes to Avoid
Even experienced artists can fall into a few traps when painting reflections. Here are some common mistakes to watch out for:
-
Over-saturating the reflection: Reflections should not overpower the original object; they should be a subtle echo of it.
-
Unrealistic edges: Reflections typically have softer, blurred edges, not sharp, well-defined lines.
-
Ignoring the surrounding environment: Reflections do not exist in isolation. The color, light, and environment around the reflective surface all affect how the reflection appears.
Conclusion
Painting reflections is a rewarding skill that requires practice, patience, and a deep understanding of light and surface properties. Whether you are working with water, glass, or metal, capturing the delicate balance between realism and artistry will transform your work. By observing your subject carefully, mastering techniques such as glazing, and paying close attention to contrasts and distortions, you can create convincing and beautiful reflections in your artwork.
Remember, practice makes perfect. Keep refining your skills, experiment with different surfaces, and most importantly, enjoy the process!
SEO Keywords: painting reflections, water reflections, painting glass, painting metal, realistic reflections, watercolor techniques, acrylic painting reflections, oil painting reflections, mastering reflections in art, glass painting techniques, painting water, reflective surfaces in painting
Hashtags: #ArtTutorials #PaintingReflections #WatercolorArt #GlassArt #RealismInArt #ArtTechniques #OilPainting #AcrylicPainting #ArtTips #ArtisticReflections
For further reading and techniques on realistic painting, visit:
*For collaborations, art features, or inquiries, please contact us at [email protected]. Don’t forget to follow us on Instagram, Facebook, Twitter.
Disclaimer: The views and opinions expressed in this article do not necessarily reflect the official policy or position of Irish Artmart.
Irish Artmart – Your Gateway to Artistic Excellence.
Tips to Express Your Creative Vision – Irish Artmart Podcast
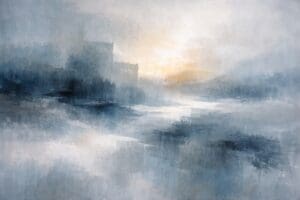
Featured Image by alba1970 from Pixabay
Explore Original Irish Art
Discover original Irish paintings, prints, and commissions from talented artists across Ireland.
Browse Art