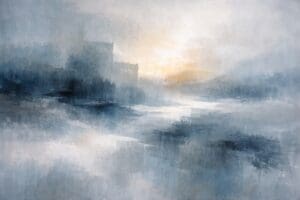
Creating Light and Shadow in Watercolor Painting: Techniques for Realism
Mastering light and shadow is essential for creating realistic and captivating watercolor paintings. By effectively using gradients, washes, and lifting techniques, artists can bring depth and dimension to their work, transforming flat compositions into lifelike masterpieces. This guide delves into techniques and tips to help watercolor artists hone their skills in rendering light and shadow with precision.
Understanding Light and Shadow in Art
Before diving into techniques, it’s crucial to understand the fundamentals of light and shadow. In art, light reveals form, while shadow adds depth. Together, they create the illusion of three-dimensionality on a two-dimensional surface.
Key terms to know:
- Highlight: The brightest area where light directly hits the object.
- Midtone: The area where light transitions into shadow.
- Core Shadow: The darkest part of the shadow on the object.
- Cast Shadow: The shadow an object projects onto a surface.
- Reflected Light: Light that bounces off nearby surfaces and subtly illuminates the shadowed areas.
Familiarize yourself with these concepts to accurately depict light and shadow in your paintings.
Tools and Materials for Success
To master light and shadow in watercolor, you’ll need:
- Quality Watercolor Paints: Invest in artist-grade paints for better pigment saturation and blending.
- Watercolor Paper: Choose paper with a weight of at least 140 lb (300 gsm) for optimal absorbency.
- Brushes: Use a variety of brushes, such as round, flat, and mop brushes, to achieve different effects.
- Palette: A mixing palette with ample space to create gradients and washes.
- Masking Fluid: Preserve highlights and areas of light.
- Sponge and Tissue: For lifting and creating texture.
Techniques for Creating Light and Shadow
1. Gradients for Smooth Transitions
Gradients are essential for transitioning between light and shadow smoothly. To create a gradient:
- Load your brush with a generous amount of pigment and water.
- Start at the darkest area (shadow) and paint with bold strokes.
- Rinse your brush, dab it on a paper towel, and blend the edge of the pigment outward into the lighter area.
- Repeat as needed to achieve a seamless transition.
Pro Tip: Practice wet-on-wet techniques for softer gradients and wet-on-dry for sharper edges.
2. Washes for Even Coverage
Washes are ideal for laying down an even layer of color that can act as a base for shadows or highlights. There are three main types:
- Flat Wash: Uniform color for skies or large areas.
- Graded Wash: Transition from dark to light within one color.
- Variegated Wash: Blend two or more colors for dynamic effects.
To create a graded wash:
- Wet your paper thoroughly.
- Start at the top with a concentrated color and gradually add more water to your brush as you move downward.
- Tilt your paper slightly to help the pigment flow naturally.
3. Lifting Techniques for Highlights
Lifting is a method of removing pigment to create highlights or soften edges. Here’s how:
- Use a clean, damp brush to gently scrub the area you want to lift.
- Dab with a tissue or sponge to absorb the pigment.
This technique is especially useful for creating highlights on reflective surfaces like glass or water.
Pro Tip: Practice lifting on scrap paper first to avoid overworking your painting.
4. Glazing for Depth
Glazing involves layering transparent washes to build depth and richness. To glaze:
- Allow each layer to dry completely before applying the next.
- Use diluted pigment to maintain transparency.
Glazing is perfect for enhancing shadows and adding subtle color shifts.
Practical Exercises
Exercise 1: Sphere Study
Paint a simple sphere to practice light and shadow. Focus on:
- Highlight placement
- Smooth transitions from midtones to shadows
- Accurate cast shadow shape
Exercise 2: Reflective Surfaces
Experiment with creating light reflections on water or glass. Use masking fluid to preserve bright highlights and practice lifting for subtle effects.
Exercise 3: Landscape Shadows
Paint a scene with strong lighting, such as a sunset or midday sun. Observe how shadows are cast by trees, rocks, and other objects.
Common Mistakes and How to Avoid Them
1. Overworking the Paper
Scrubbing too hard can damage the surface. Be gentle and use quality paper.
2. Ignoring Color Temperature
Shadows are not just darker versions of the base color; they often have a cooler tone. Experiment with mixing complementary colors for realistic shadows.
3. Skipping Value Studies
Plan your painting by sketching a value study in black and white to determine light and shadow placement.
Conclusion
Creating light and shadow in watercolor painting is a rewarding skill that enhances the realism and emotional impact of your artwork. By mastering gradients, washes, lifting techniques, and understanding the interplay of light and shadow, you can elevate your watercolor paintings to new heights.
Remember to practice regularly and observe how light interacts with objects in real life. With dedication, you’ll develop a keen eye for capturing light and shadow with precision.
Start experimenting with these techniques today and discover the magic of light and shadow in your watercolor paintings!
*For collaborations, art features, or inquiries, please contact us at [email protected]. Don’t forget to follow us on Instagram, Facebook, Twitter.
Disclaimer: The views and opinions expressed in this article do not necessarily reflect the official policy or position of Irish Artmart.
Irish Artmart – Your Gateway to Artistic Excellence.
Tips to Express Your Creative Vision – Irish Artmart Podcast
Image by Alexandra_Koch from Pixabay


