Watercolor painting is a versatile and expressive medium that allows artists to create beautiful, fluid, and dynamic works of art. The techniques used in watercolor painting can vary greatly, offering a wide range of possibilities for artists of all skill levels. In this blog post, we’ll delve into four essential watercolor techniques: Wet-on-Wet, Dry Brush, Lifting, and Blotting. These techniques will help you achieve different effects and expand your watercolor skills.
Wet-on-Wet Technique
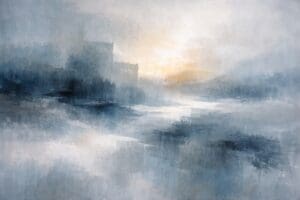
The Wet-on-Wet technique is one of the most popular and fundamental methods in watercolor painting. This technique involves applying wet paint onto a wet surface, creating soft, diffused edges and beautiful gradients. It’s perfect for creating backgrounds, skies, and other elements where a smooth transition of color is desired.
How to Use the Wet-on-Wet Technique
- Prepare Your Paper: Begin by thoroughly wetting your watercolor paper with clean water using a large brush or a sponge. Ensure the surface is evenly saturated but not puddled.
- Apply Paint: Load your brush with the desired color and gently touch it to the wet surface. The paint will spread and blend with the water, creating soft edges and beautiful color transitions.
- Experiment with Colors: Try adding different colors to the wet surface to see how they blend and interact. This technique is excellent for creating sunsets, ocean waves, and dreamy landscapes.
Tips for Wet-on-Wet Technique
- Control the Water: Too much water can cause the paint to run uncontrollably, while too little water won’t allow the colors to blend smoothly. Experiment to find the right balance.
- Timing: Work quickly as the paper dries, the paint will behave differently. Re-wet areas as needed to maintain the desired effect.
For more inspiration and detailed tutorials on the Wet-on-Wet technique, check out Artist Network.
Dry Brush Technique
The Dry Brush technique is the opposite of Wet-on-Wet, offering crisp, textured strokes that are ideal for adding details and creating texture in your painting. This method involves using a brush with minimal water and paint, allowing you to create controlled, precise marks.
How to Use the Dry Brush Technique
- Prepare Your Brush: Dip your brush lightly in paint and then blot it on a paper towel to remove excess moisture. The brush should feel relatively dry.
- Apply Paint: Use the brush to make short, quick strokes on dry paper. The paint will appear textured and grainy, giving a different effect than smooth, wet techniques.
- Build Layers: Dry brush technique works well for building up layers and adding intricate details such as fur, grass, or textured surfaces.
Tips for Dry Brush Technique
- Brush Selection: Use brushes with stiffer bristles for better control and texture.
- Surface Texture: Rougher paper can enhance the dry brush effect, giving your painting a more tactile quality.
For an in-depth guide on the Dry Brush technique, visit Watercolor Misfit.
Lifting Technique
Lifting is a valuable technique that allows artists to remove or lighten areas of paint. This method can be used to correct mistakes, add highlights, or create interesting textures.
How to Use the Lifting Technique
- Wet the Area: Using a clean, damp brush, gently wet the area you want to lift. Be careful not to oversaturate.
- Lift the Paint: Use a clean, dry brush or a paper towel to blot the wet area, lifting the paint off the paper. Repeat as necessary until you achieve the desired lightness.
- Refine Details: For finer details, use a smaller brush or a cotton swab to lift specific areas.
Tips for Lifting Technique
- Timing: Lifting works best when the paint is still slightly wet. Dry paint can be harder to remove.
- Paper Quality: High-quality watercolor paper is more forgiving and allows for better lifting without damaging the surface.
For more information on the Lifting technique, check out Artists and Illustrators.
Blotting Technique
Blotting is another essential technique for watercolor artists, useful for creating textures, removing excess paint, and adding highlights. This method involves using absorbent materials to lift paint from the surface.
How to Use the Blotting Technique
- Apply Paint: Begin by applying a wash of color to your paper.
- Blot with Absorbent Material: While the paint is still wet, use a paper towel, sponge, or tissue to gently blot the surface, removing some of the paint. This creates interesting textures and can lighten areas.
- Control the Effect: Experiment with different materials and pressure to achieve various textures and effects.
Tips for Blotting Technique
- Material Choice: Different materials (paper towels, sponges, tissues) will create different textures. Experiment to see what works best for your desired effect.
- Timing: Blotting works best while the paint is still wet. Once dry, the paint is harder to lift.
For detailed tutorials on the Blotting technique, visit Winsor & Newton.
Combining Techniques
One of the beauties of watercolor painting is the ability to combine techniques to create complex and stunning works of art. Here are a few ways to integrate these techniques:
- Wet-on-Wet Background with Dry Brush Details: Create a soft, blended background using the Wet-on-Wet technique, then add sharp, textured details with the Dry Brush method.
- Lifting Highlights on a Wet-on-Wet Base: After creating a smooth gradient with Wet-on-Wet, use the Lifting technique to add highlights and create depth.
- Blotting for Texture and Lifting for Refinement: Use the Blotting technique to add texture to a wash, then refine the painting with the Lifting technique for precise highlights and corrections.
Practice and Experimentation
Mastering watercolor techniques requires practice and a willingness to experiment. Here are some tips to help you improve:
- Practice Regularly: Set aside time each week to practice these techniques. The more you paint, the more comfortable you’ll become.
- Experiment: Don’t be afraid to try new things. Mix and match techniques to see what effects you can create.
- Learn from Others: Join watercolor communities online or in person. Websites like DeviantArt and WetCanvas are great places to connect with other artists and share your work.
Conclusion
Watercolor painting is a rewarding and versatile medium, offering endless possibilities for creativity. By mastering techniques like Wet-on-Wet, Dry Brush, Lifting, and Blotting, you can create stunning works of art that showcase your unique style. Remember, practice and experimentation are key. Don’t be afraid to make mistakes and learn from them.
We hope this guide has inspired you to explore these watercolor techniques and incorporate them into your own artwork. Happy painting!
References
This post is designed to be informative and engaging for watercolor enthusiasts of all levels. By incorporating practical advice, third-party links for further learning, and community engagement through social media, it aims to be a comprehensive resource for artists looking to enhance their skills.
*For collaborations, art features, or inquiries, please contact us at [email protected]. Don’t forget to follow us on Instagram, Facebook, Twitter.
Disclaimer: The views and opinions expressed in this article do not necessarily reflect the official policy or position of Irish Artmart.
Irish Artmart – Your Gateway to Artistic Excellence.
Explore Original Irish Art
Discover original Irish paintings, prints, and commissions from talented artists across Ireland.
Browse Art