Mastering Acrylic Landscapes: A Beginner’s Guide to Painting Natural Scenes
Creating stunning landscape art is a rewarding journey, and acrylic paints are a fantastic medium for capturing the beauty of nature. Whether you’re inspired by rolling hills, tranquil lakes, or lush forests, acrylics offer endless possibilities to explore texture, depth, and light in your landscapes. If you’re a beginner looking to dive into acrylic landscape painting, this guide will introduce you to essential techniques like layering, blending, and using acrylics to create depth and texture, while also covering the basic tools you’ll need for success.
1. Introduction to Acrylic Landscape Painting
Acrylic painting offers flexibility and vibrancy, making it ideal for beginners. Its quick-drying nature allows artists to build layers and work on details in a relatively short amount of time. When it comes to landscape painting, acrylics can help you achieve rich, saturated colors and realistic or abstract effects, depending on your style. With a few basic techniques and the right mindset, you’ll be able to paint natural scenes that feel alive and captivating.
Landscape painting can seem daunting at first, but with practice, you’ll find your own voice and artistic style. Whether you’re drawn to realistic representations of the natural world or prefer abstract interpretations, mastering a few key techniques will set you on the right path.
2. Tools and Materials for Acrylic Landscape Painting
Before starting, it’s essential to gather the right tools and materials. Here’s a list of the basics:
-
Acrylic Paints: Choose high-quality acrylic paints. A basic set of primary colors (red, yellow, blue), white, and black will cover most landscape needs. Consider adding earth tones like burnt sienna, raw umber, and ochre to your palette for natural hues.
-
Brushes: Landscape painting requires different types of brushes for varied effects:
-
Flat Brushes: Perfect for creating straight lines, large areas, and sweeping strokes.
-
Round Brushes: Great for details, foliage, and fine lines.
-
Fan Brushes: Excellent for textures like grass or tree leaves.
-
Filbert Brushes: Ideal for blending and soft edges.
-
-
Canvas or Acrylic Paper: Acrylics work well on canvas, canvas boards, or acrylic paper. Choose a surface that suits your desired outcome.
-
Palette: You’ll need a palette for mixing paints. A flat, smooth surface is ideal for mixing acrylics.
-
Water or Mediums: Water is used to thin acrylics, and acrylic mediums can be added to change the paint’s texture, transparency, or drying time.
-
Palette Knife: For mixing paints and creating texture directly on the canvas.
-
Rags or Paper Towels: For cleaning brushes and controlling paint consistency.
3. Understanding Acrylic Paint and Its Properties
Acrylic paint is a versatile medium that combines pigments with a polymer emulsion, making it water-soluble when wet but water-resistant once dry. Unlike oils, acrylics dry quickly, which can be both an advantage and a challenge for beginners. To overcome this, artists often use acrylic retarders or slow-drying mediums to extend the working time.
Because acrylics can be thinned with water, they can be used in a variety of ways—from translucent glazes to thick, impasto layers. Acrylics can mimic the appearance of oils or watercolors, making them an excellent choice for landscape painting.
4. Key Techniques for Acrylic Landscape Painting
Now that you have your materials ready, it’s time to dive into the techniques that will help you paint breathtaking landscapes.
Layering for Depth
Layering is a fundamental technique in landscape painting, as it creates depth and dimension. Acrylic paints dry quickly, allowing you to build multiple layers without waiting for long periods. Here’s how you can effectively layer:
-
Start with a Background Layer: The first layer, often referred to as the underpainting, sets the tone for your landscape. Begin by painting large areas of your scene with thin, watered-down paint, establishing the main shapes and colors.
-
Build Up Layers: Once the first layer is dry, you can start building more detailed layers. Add midtones and dark values to create depth and contrast. Keep in mind that lighter colors typically come forward, while darker colors recede into the background.
-
Glazing: A glazing medium can be used to create transparent layers over your underpainting. This technique adds depth and luminosity to your work. Use it to soften edges and transition colors seamlessly.
Blending for Smooth Transitions
Blending is key to achieving smooth transitions between elements in a landscape, such as the sky meeting the horizon or soft light filtering through trees. Here’s how to blend successfully:
-
Use a Wet Brush: Keep your brushes moist to make blending easier. Don’t let your paint dry out too quickly, as this can cause harsh lines. If necessary, use a slow-drying medium to give yourself more time.
-
Feathering Edges: To create smooth transitions, gently feather the edges of one color into another. This softens the transitions and avoids sharp lines.
-
Layered Blending: Blend colors progressively by layering one on top of the other. You can blend with a flat or filbert brush, making small circular strokes to keep colors flowing naturally.
Creating Texture in Landscapes
Texture is essential in landscape painting, as it brings your scene to life. Whether it’s the rough texture of mountains or the soft leaves on a tree, texture creates a tactile feel that adds realism.
-
Dry Brushing: Use a dry brush (with minimal paint) to create rough, scratchy textures for elements like tree bark, rocks, or grass. Gently drag the brush across the canvas for a natural, uneven effect.
-
Palette Knife: A palette knife is great for creating bold textures, such as impasto strokes for mountains or textured clouds. Apply thick paint with the knife, allowing the surface to be raised for a more dynamic look.
-
Stippling: Use a round brush to apply small dots of paint. This technique works well for painting foliage or the texture of fields.
5. Step-by-Step: Painting a Simple Landscape Scene
Let’s walk through a simple landscape painting using the techniques mentioned above.
Step 1: Sketch Your Scene
Start by lightly sketching the main elements of your landscape with a pencil. Outline the horizon line, placement of trees, mountains, or any other focal points.
Step 2: Paint the Sky
Begin by painting the sky. Use a flat brush and a diluted mix of blue and white to create a gradient effect, with lighter tones at the horizon and deeper shades at the top.
Step 3: Add Background Elements
Once the sky is dry, add the background elements like mountains, distant trees, or a body of water. Use lighter colors for these elements to suggest they are farther away.
Step 4: Build Up the Foreground
For the foreground, use darker tones and more opaque layers to bring objects closer to the viewer. Add details like rocks, bushes, or grass with textured techniques.
Step 5: Add Highlights and Details
Use small brushes to add highlights to areas that catch the light, such as the tops of trees or the reflection of the sky in water. This will help add contrast and realism to the painting.
Step 6: Final Touches
Once you’re happy with the overall composition, add the final touches. Consider glazing certain areas to enhance the color depth or using a palette knife for bold texture on rocks or mountains.
6. Troubleshooting Common Challenges
Problem: The sky looks too flat.
Solution: Try blending more colors and creating gradient transitions between light and dark shades to give the sky more depth and dimension.
Problem: The paint is drying too quickly.
Solution: Use a slow-drying medium or work with smaller sections to keep the paint moist as you work.
Problem: The texture is too harsh or uneven.
Solution: Adjust your brush pressure or try using a softer brush to smooth out the texture. Alternatively, you can layer a transparent glaze over the area to soften it.
7. Final Thoughts and Encouragement
Acrylic landscape painting is a fantastic way to express your love for nature, whether through realistic portrayals or more abstract interpretations. The techniques of layering, blending, and creating texture will help you develop your skills and confidence as an artist. Remember, every painting is a step toward improvement, so don’t be discouraged by initial challenges.
With patience and practice, you’ll soon find yourself mastering the art of acrylic landscapes. Keep experimenting, and enjoy the creative process!
*For collaborations, art features, or inquiries, please contact us at [email protected]. Don’t forget to follow us on Instagram, Facebook, Twitter.
Disclaimer: The views and opinions expressed in this article do not necessarily reflect the official policy or position of Irish Artmart.
Irish Artmart – Your Gateway to Artistic Excellence.
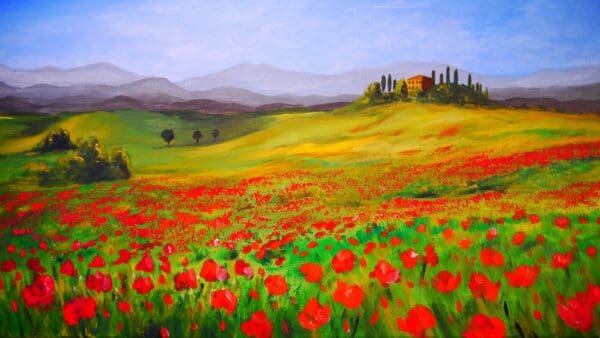
Image by Peter Kraayvanger from Pixabay
Explore Original Irish Art
Discover original Irish paintings, prints, and commissions from talented artists across Ireland.
Browse Art